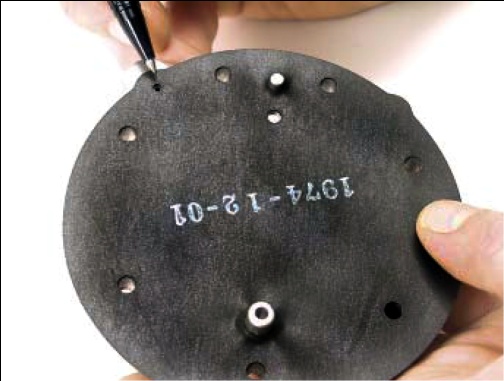
17. Set the primary diaphragm (18) in place on the plate (14). Line up the screw holes to the plate.
18. Carefully place the primary cover (19) over the dia-phragm (18). Hand-thread the screws (20) through the cover and plate (14) into the converter body (10).
19. Tighten the screws (20) to 37-43 in-lb. (4.2-4.9 N•m) in a criss-cross pattern.
20. Assemble the new secondary seat (8) and new sec-ondary lever (6) by inserting the seat retaining tip to the end opening of the lever as shown. Be sure the new seat properly locks into place.
21. Position the secondary spring (9) in place on the body (10). Place the secondary lever assembly (6 & 8) into place over the spring (9).
22. Hold the lever assembly (6 & 8) with the fulcrum pin (7) in place in its locating groove and fasten in place with the retaining screw (5).
23. Tighten the screw (5) to 29-35 in.lbs. (3.3-4.0 N•m).
24. The end of the secondary lever (6) should be 1/32" be-low the level of the body casting (10). Use a straight edge to measure. Remove and gently bend the lever if necessary to obtain the correct height.
NOTE: Bending the lever while installed may result in damage to the seat (8). Remove the lever from the body, bend, reinstall, and then re-check the height.

25. Align the secondary diaphragm (4) to the secondary lever (6) as shown. The end of the lever must protrude through the tab slot on the bottom of the new dia-phragm (4) after installation. The gap from which the link is punched should be located toward the gas inlet.
26. Install the secondary cover (3) with the six screws (2).
27. Tighten the screws (2) in a crisscross pattern to 29-35 in-lb. (3.3-4.0 N•m), to complete the installation of the repair kit components.
28. Attach a 100 psi air pressure hose to the regulator "IN-LET" fitting.
29. For models with a primer button: Depress the primer button several times. Air flow should be detected when the primer is depressed.
NOTE: Not all models include a primer button. Skip this step for models without a primer button.
30. Check the primary cover for leaks using liquid leak de-tector solution.
31. Make sure one of the regulator's secondary outlets is plugged. Draw a bubble of leak solution over the other regulator outlet. The bubble should hold for several se-conds when the regulator is pressurized. If any leaks are found, the regulator must be replaced. If no leaks are found, the regulator can be reinstalled and returned to service.


